A video tutorial to explain how the K’NEFFs 4 ply string twister works, made of K’NEX parts it’s a really good starting point to make your own spintop strings…
Full handbook of the now famous Kneffy’ string twister just below video… With assembly guide and quick setup even available for download!
From Chris own comment:
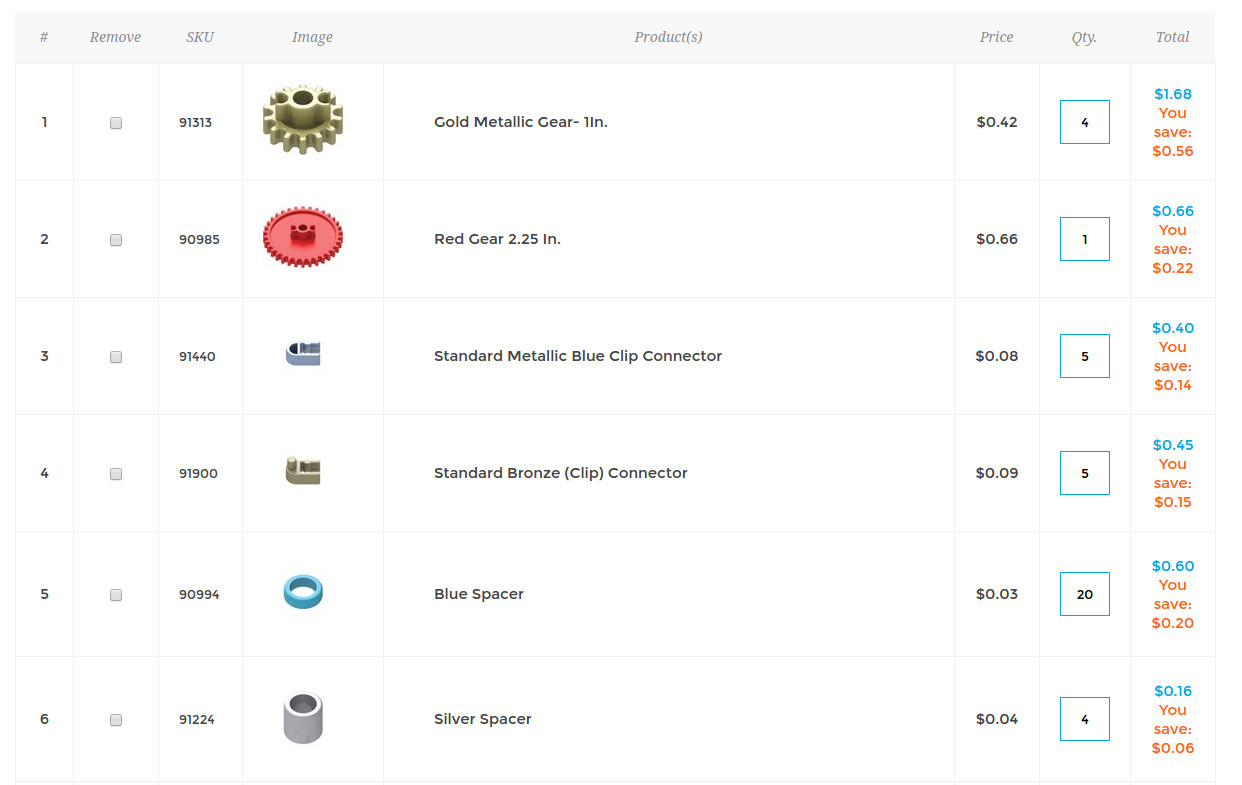
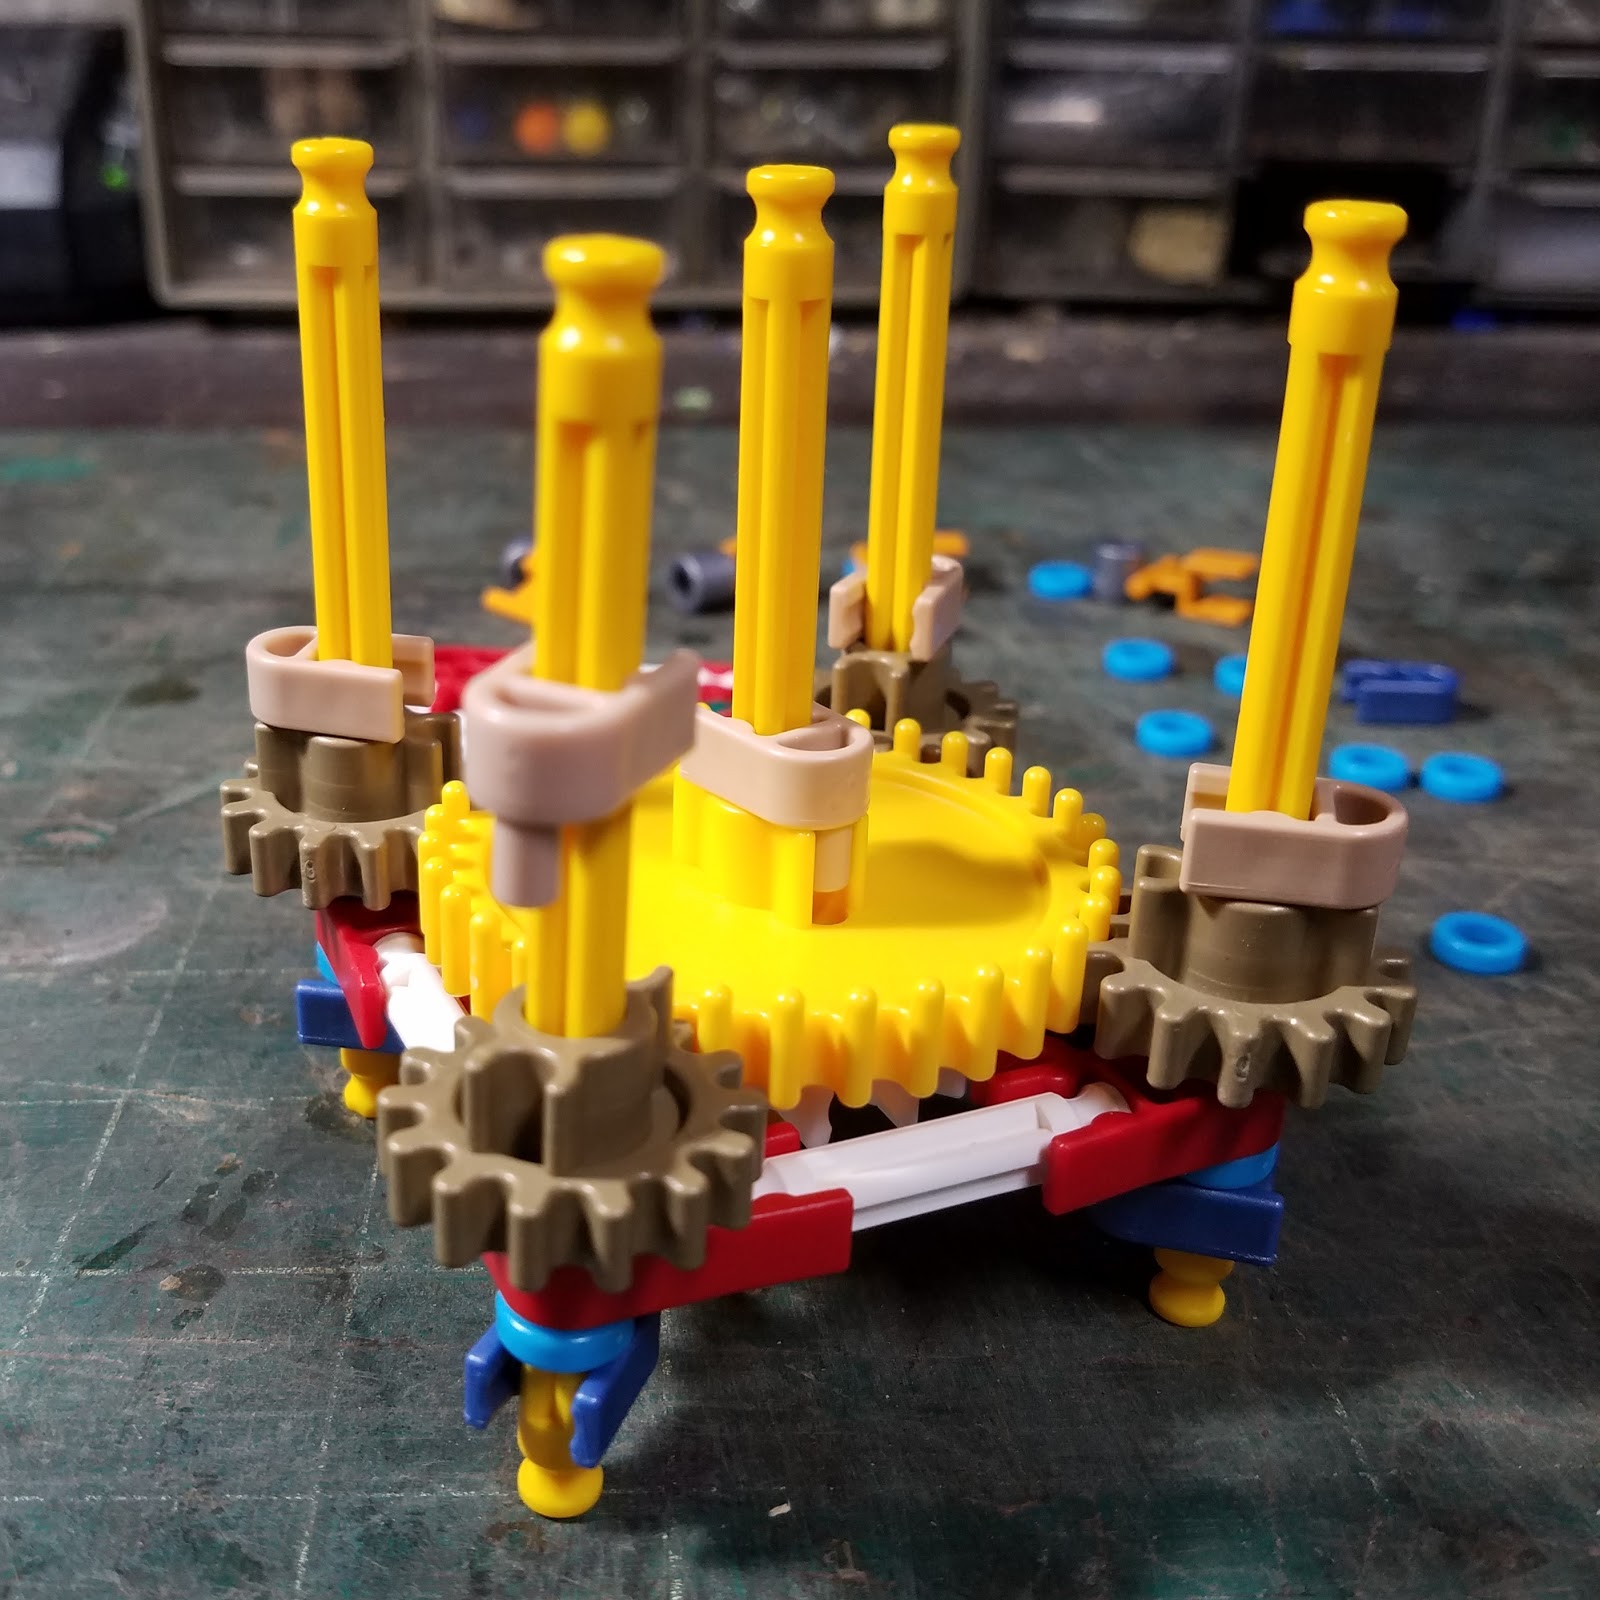
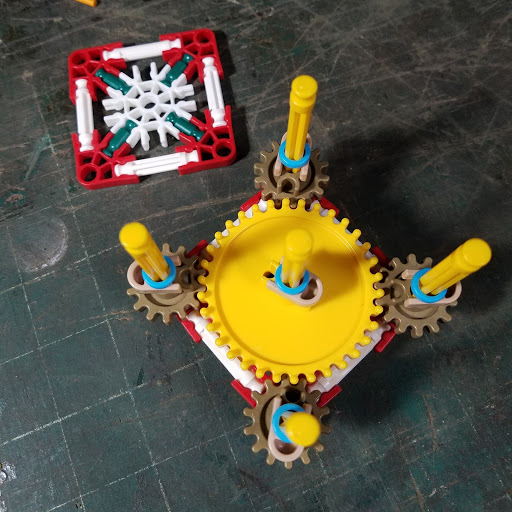
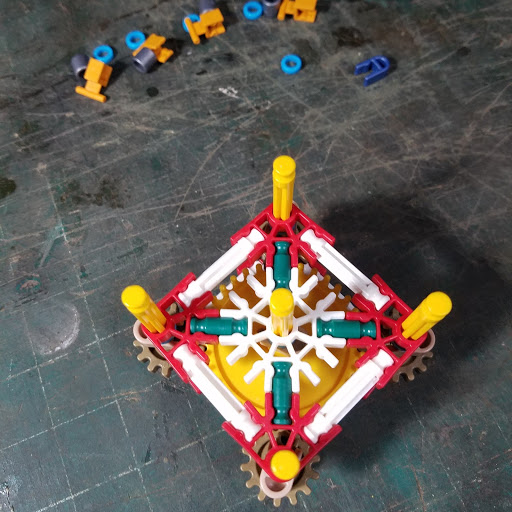
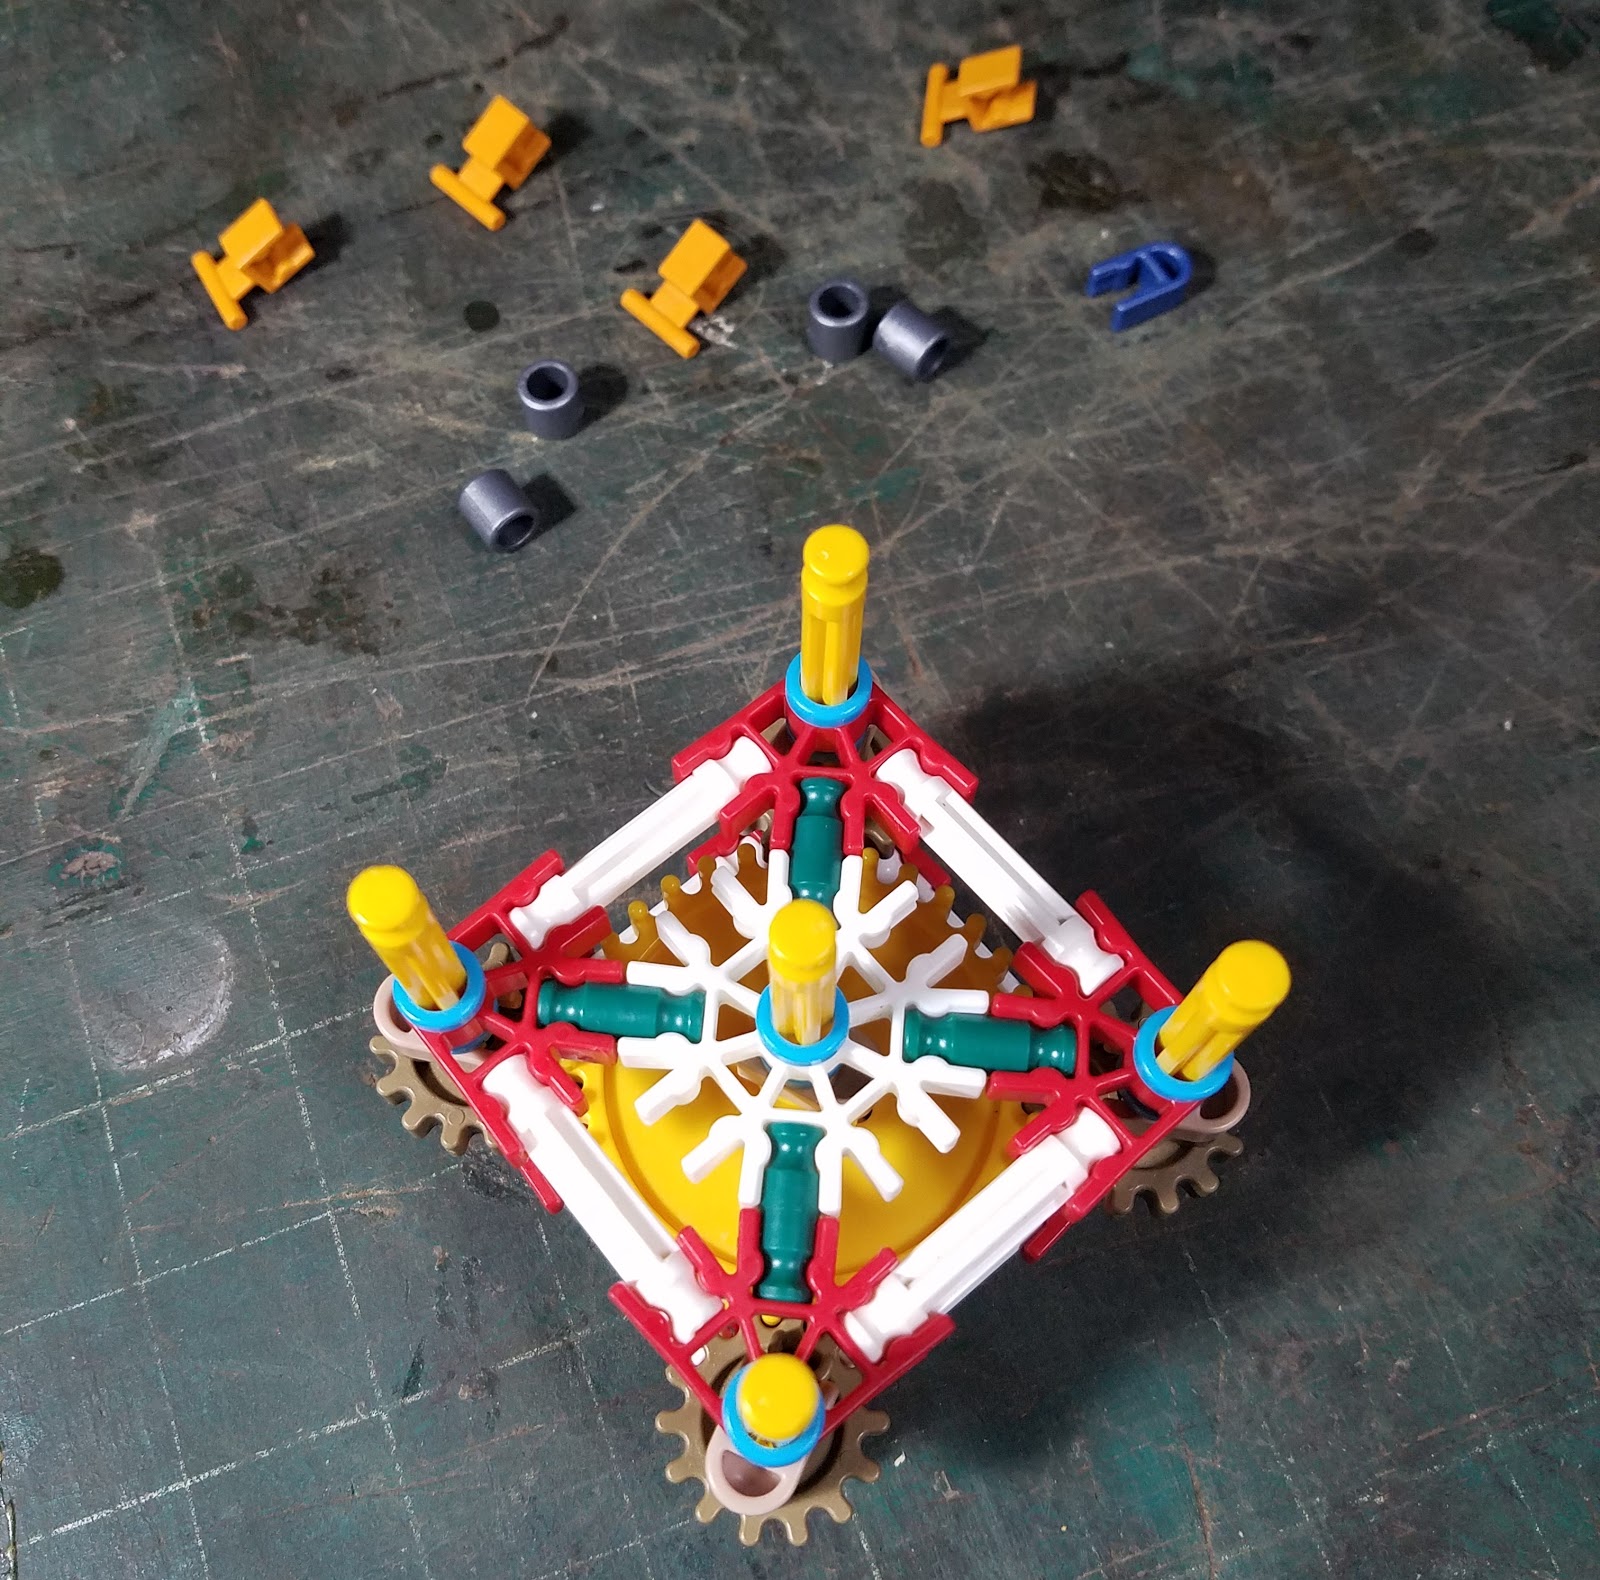
Here is a list of the K’Nexx parts you’ll have to collect in order to make your own 4 ply string twister:
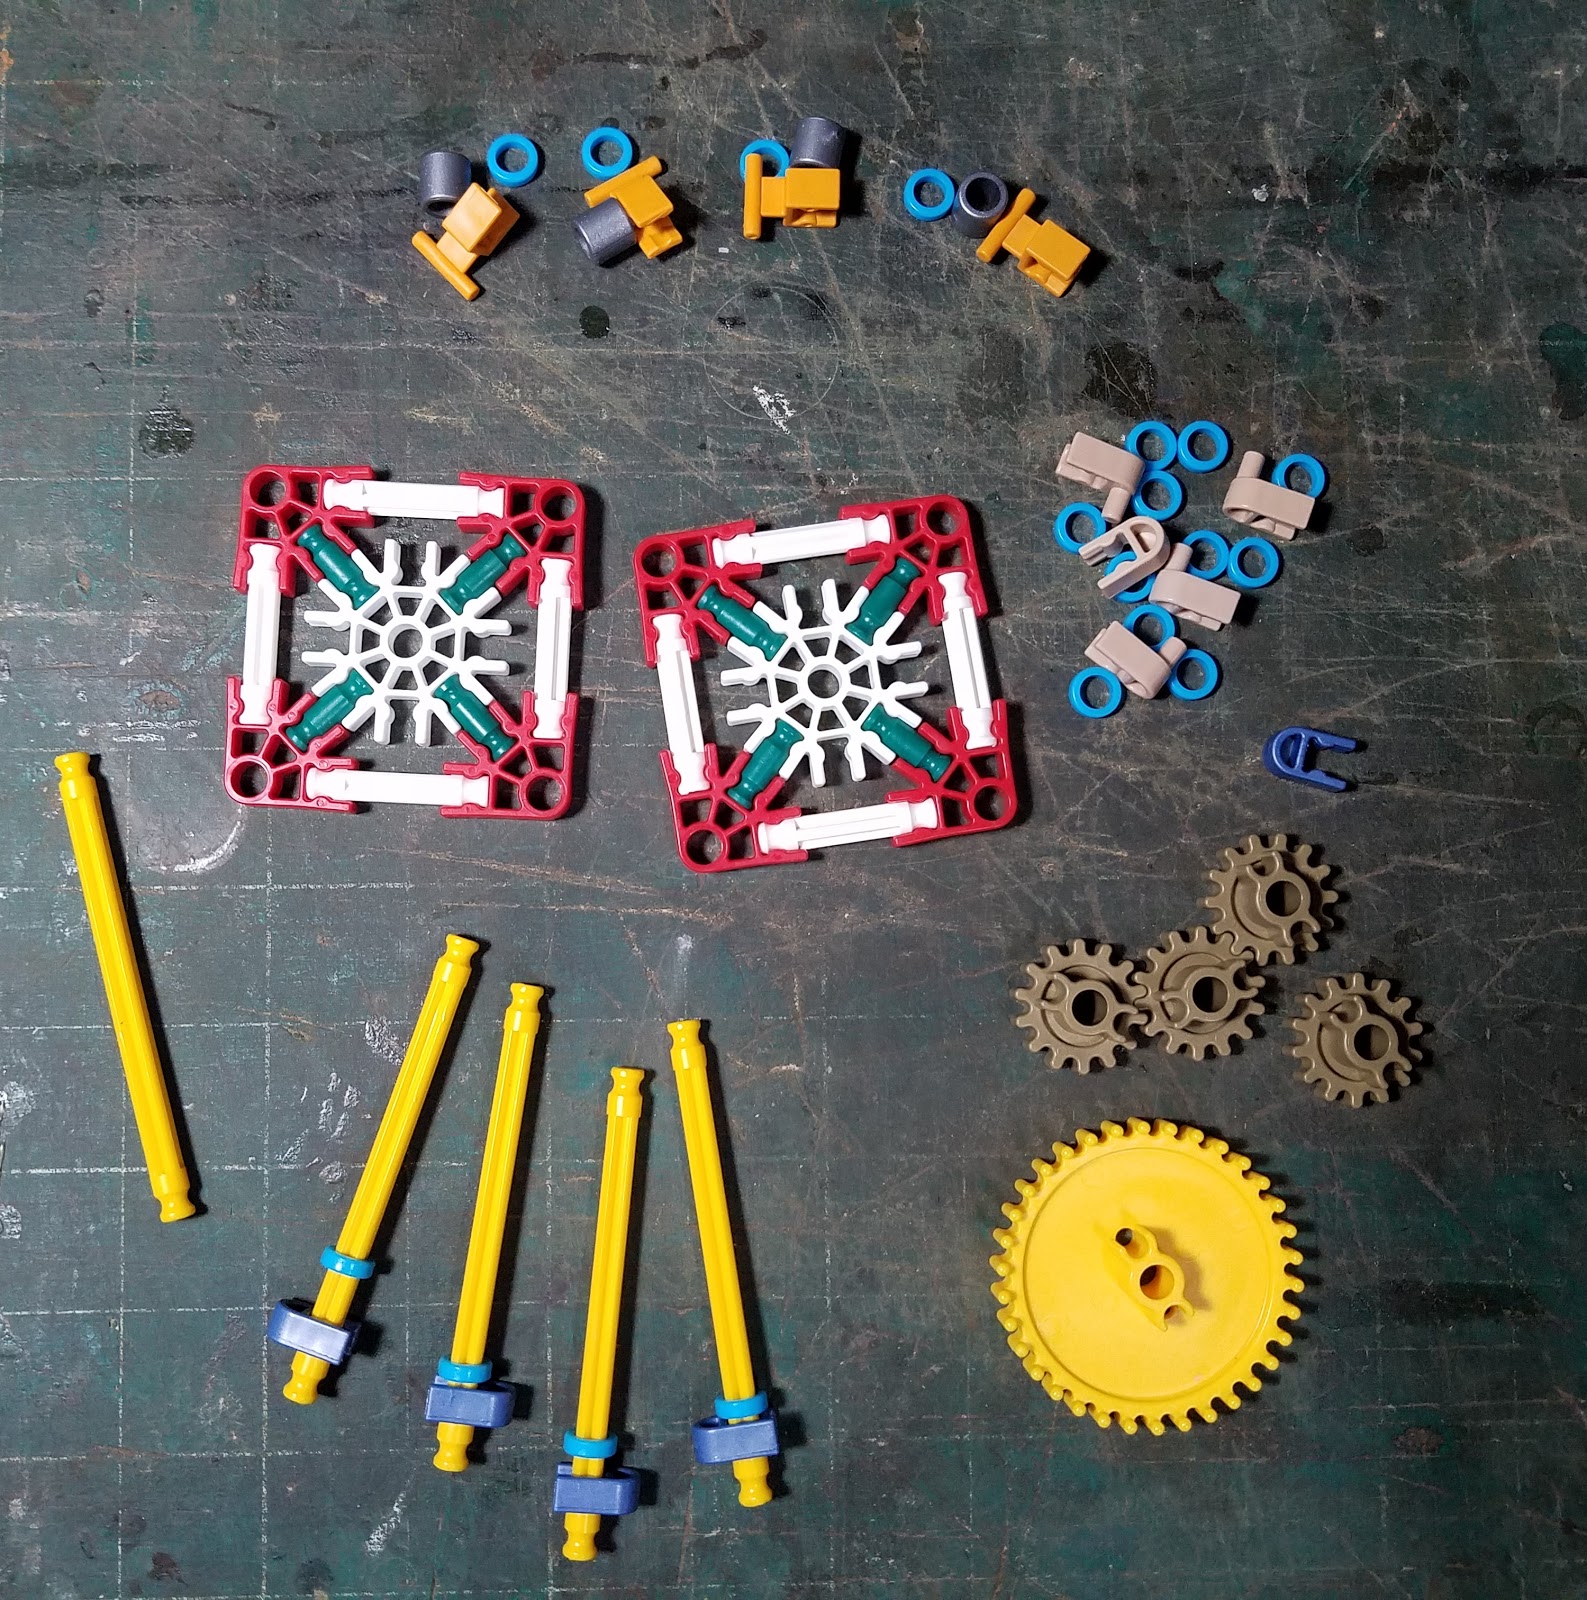
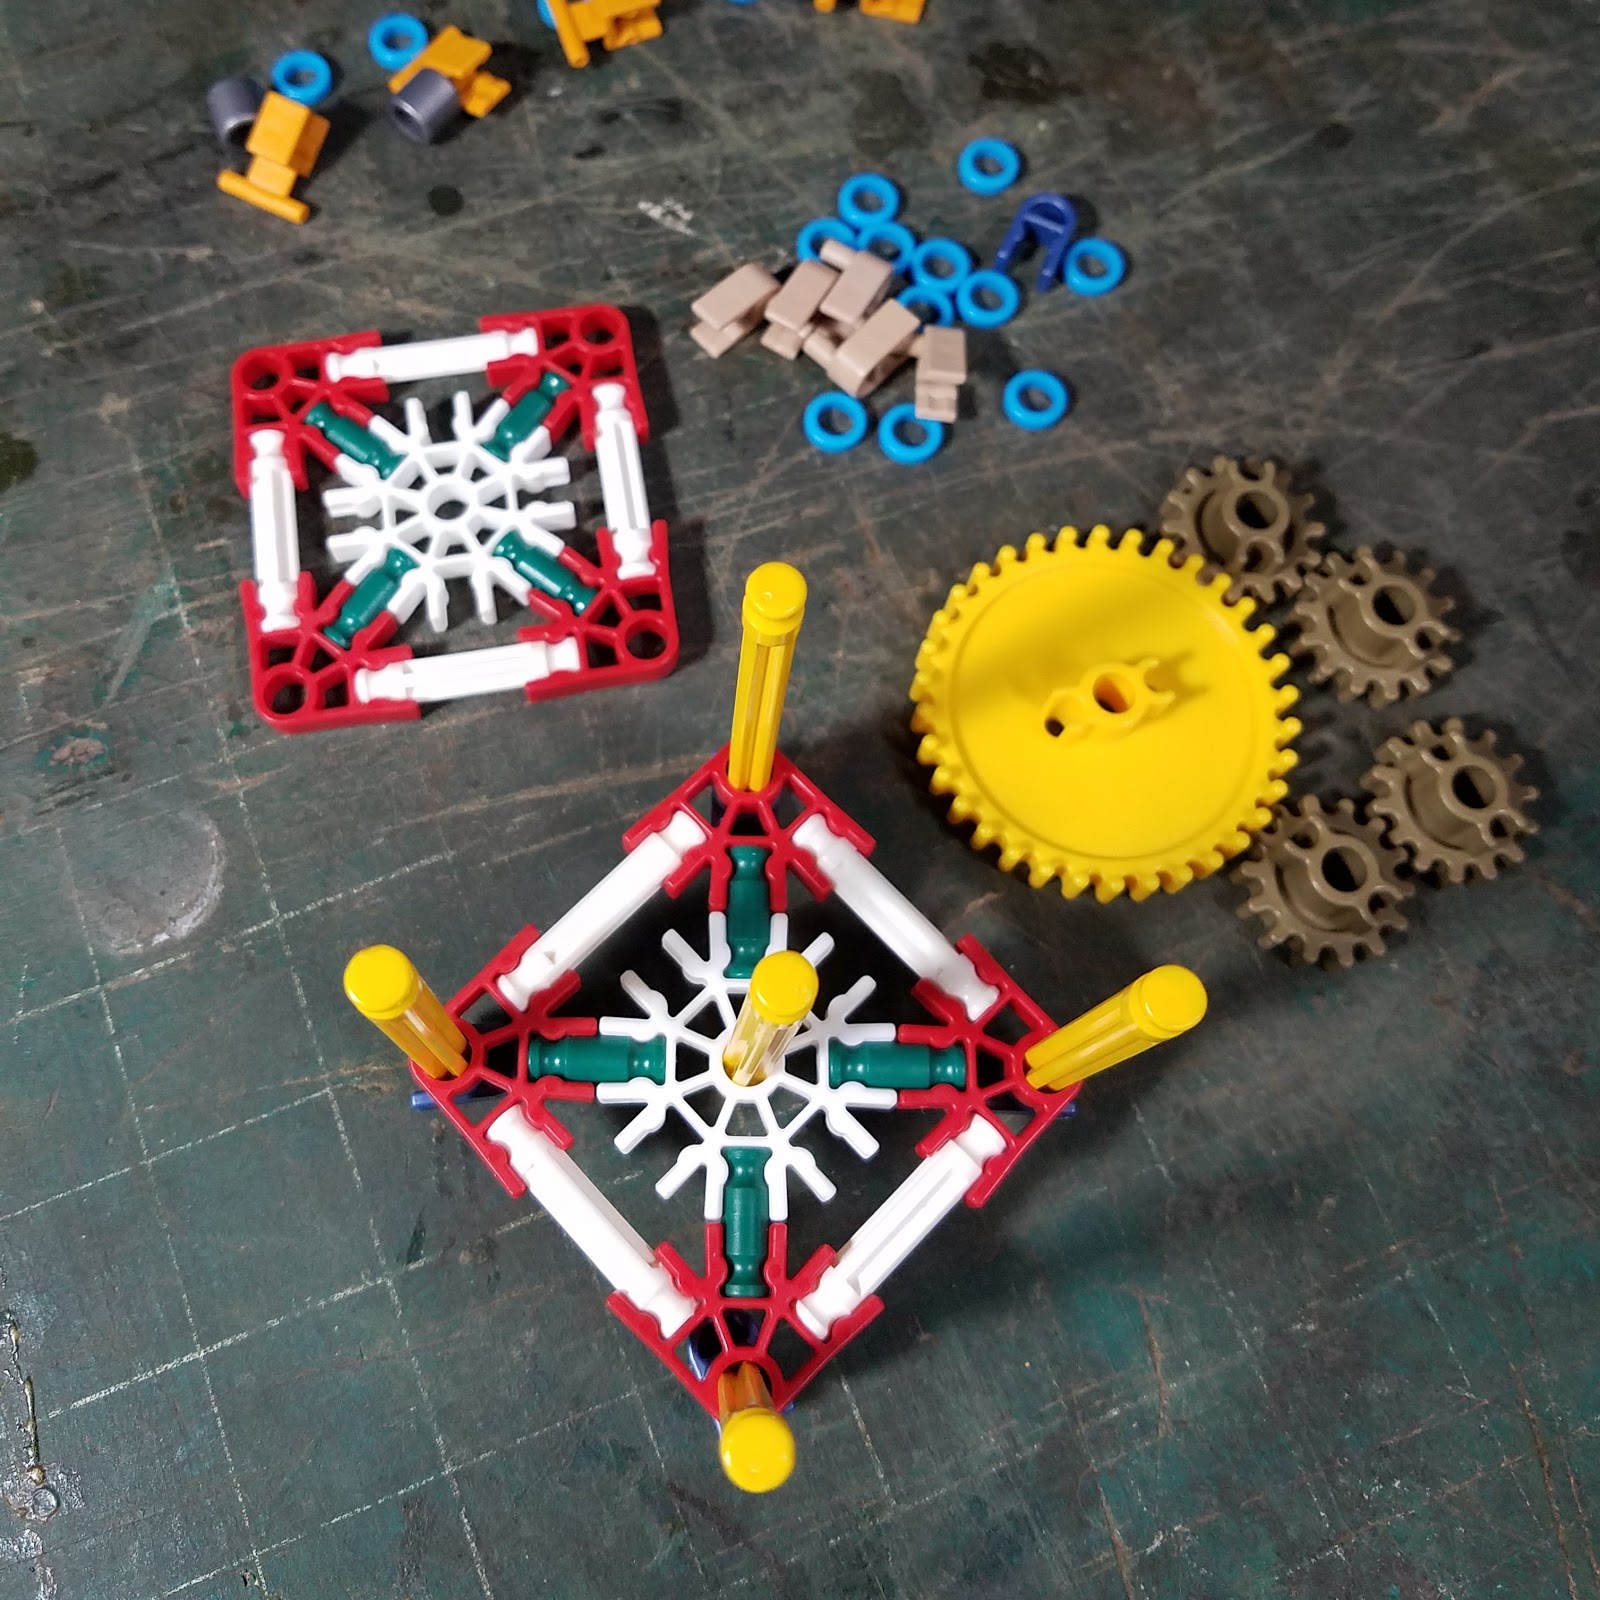
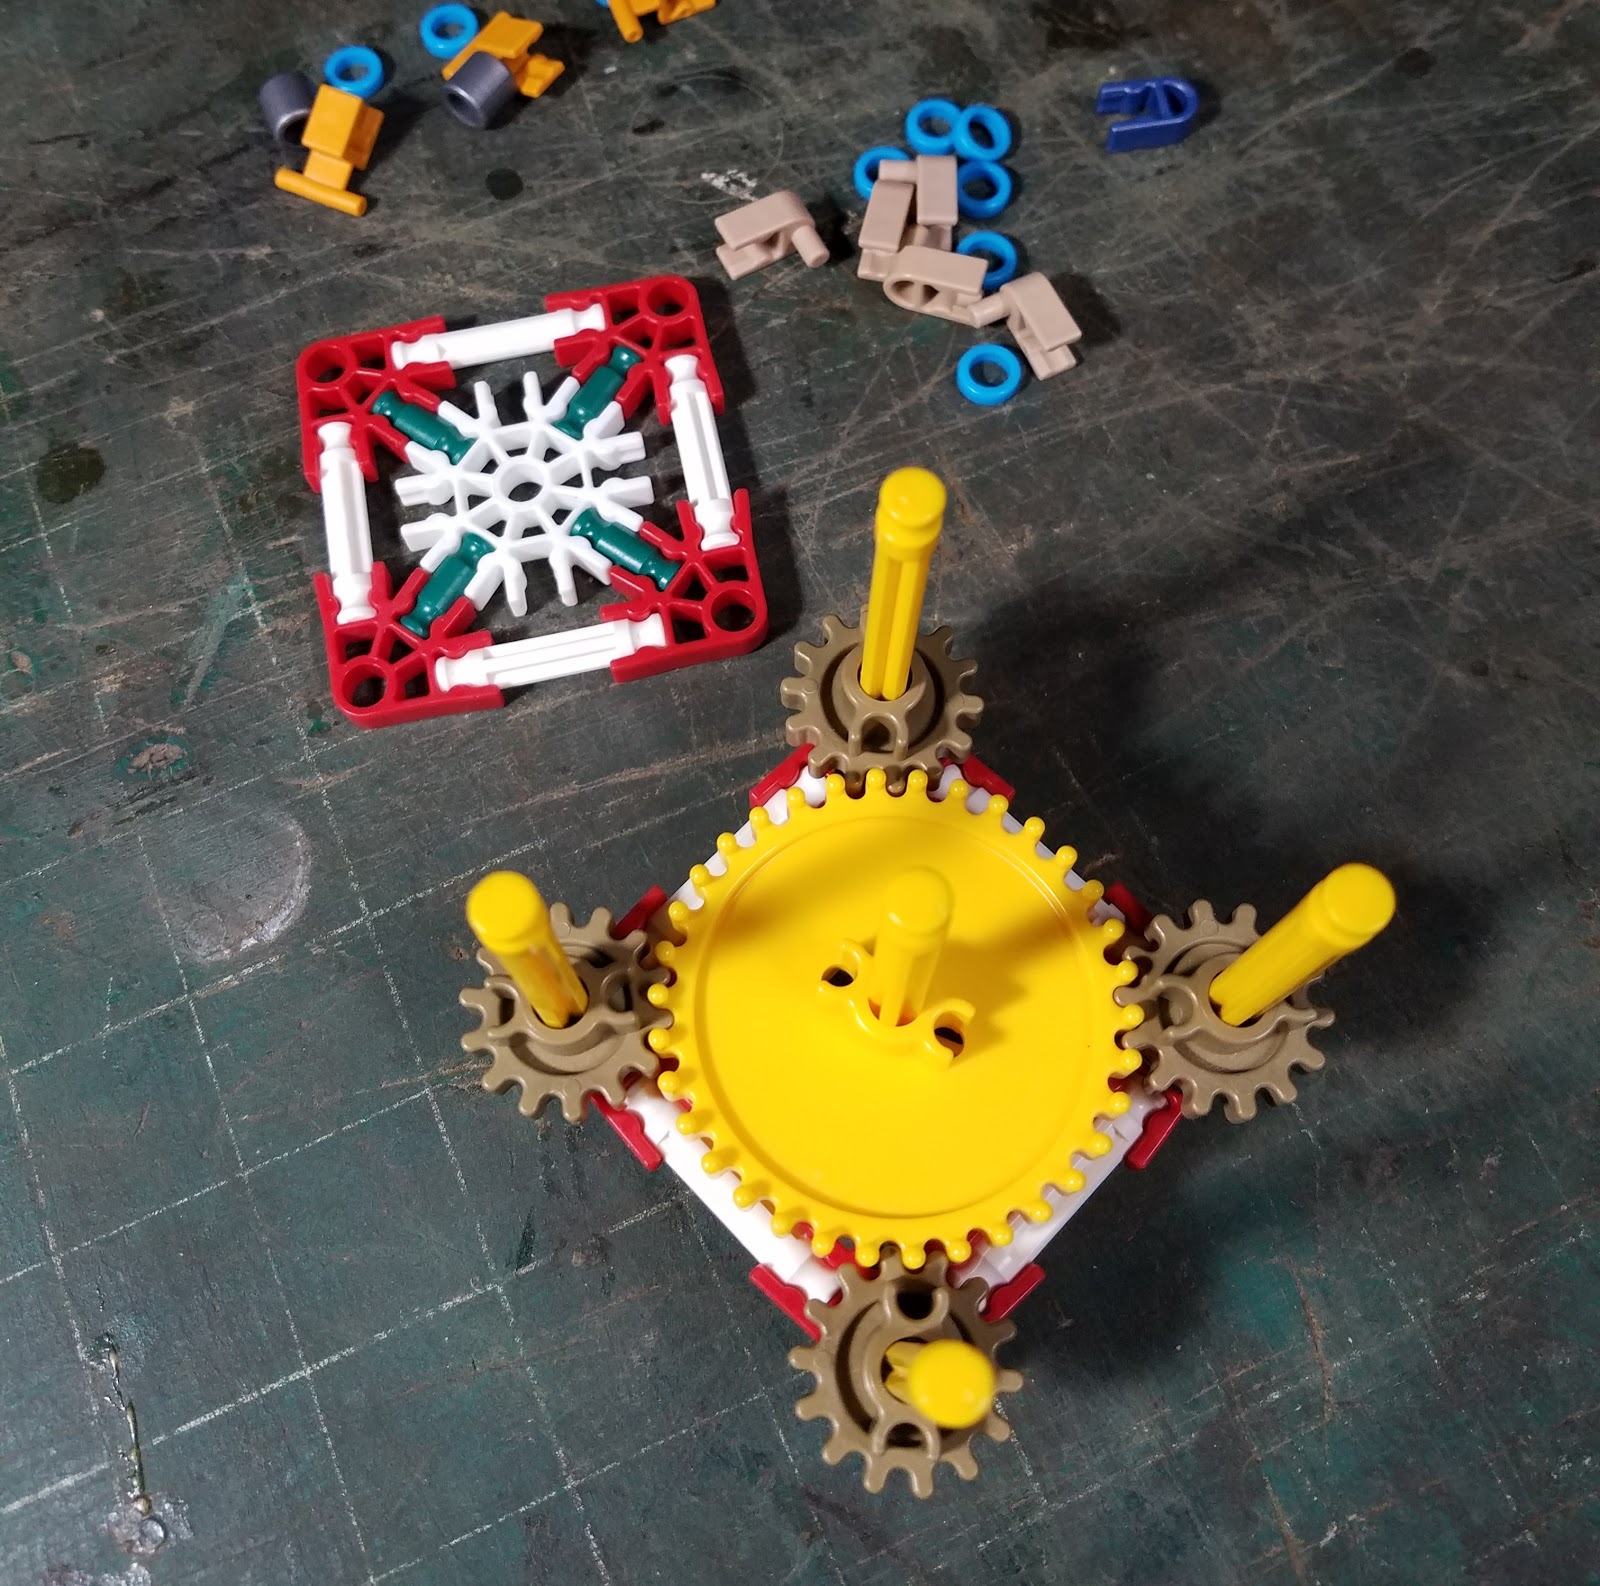
Step by step assembly of the K’Neffy’ string twister:


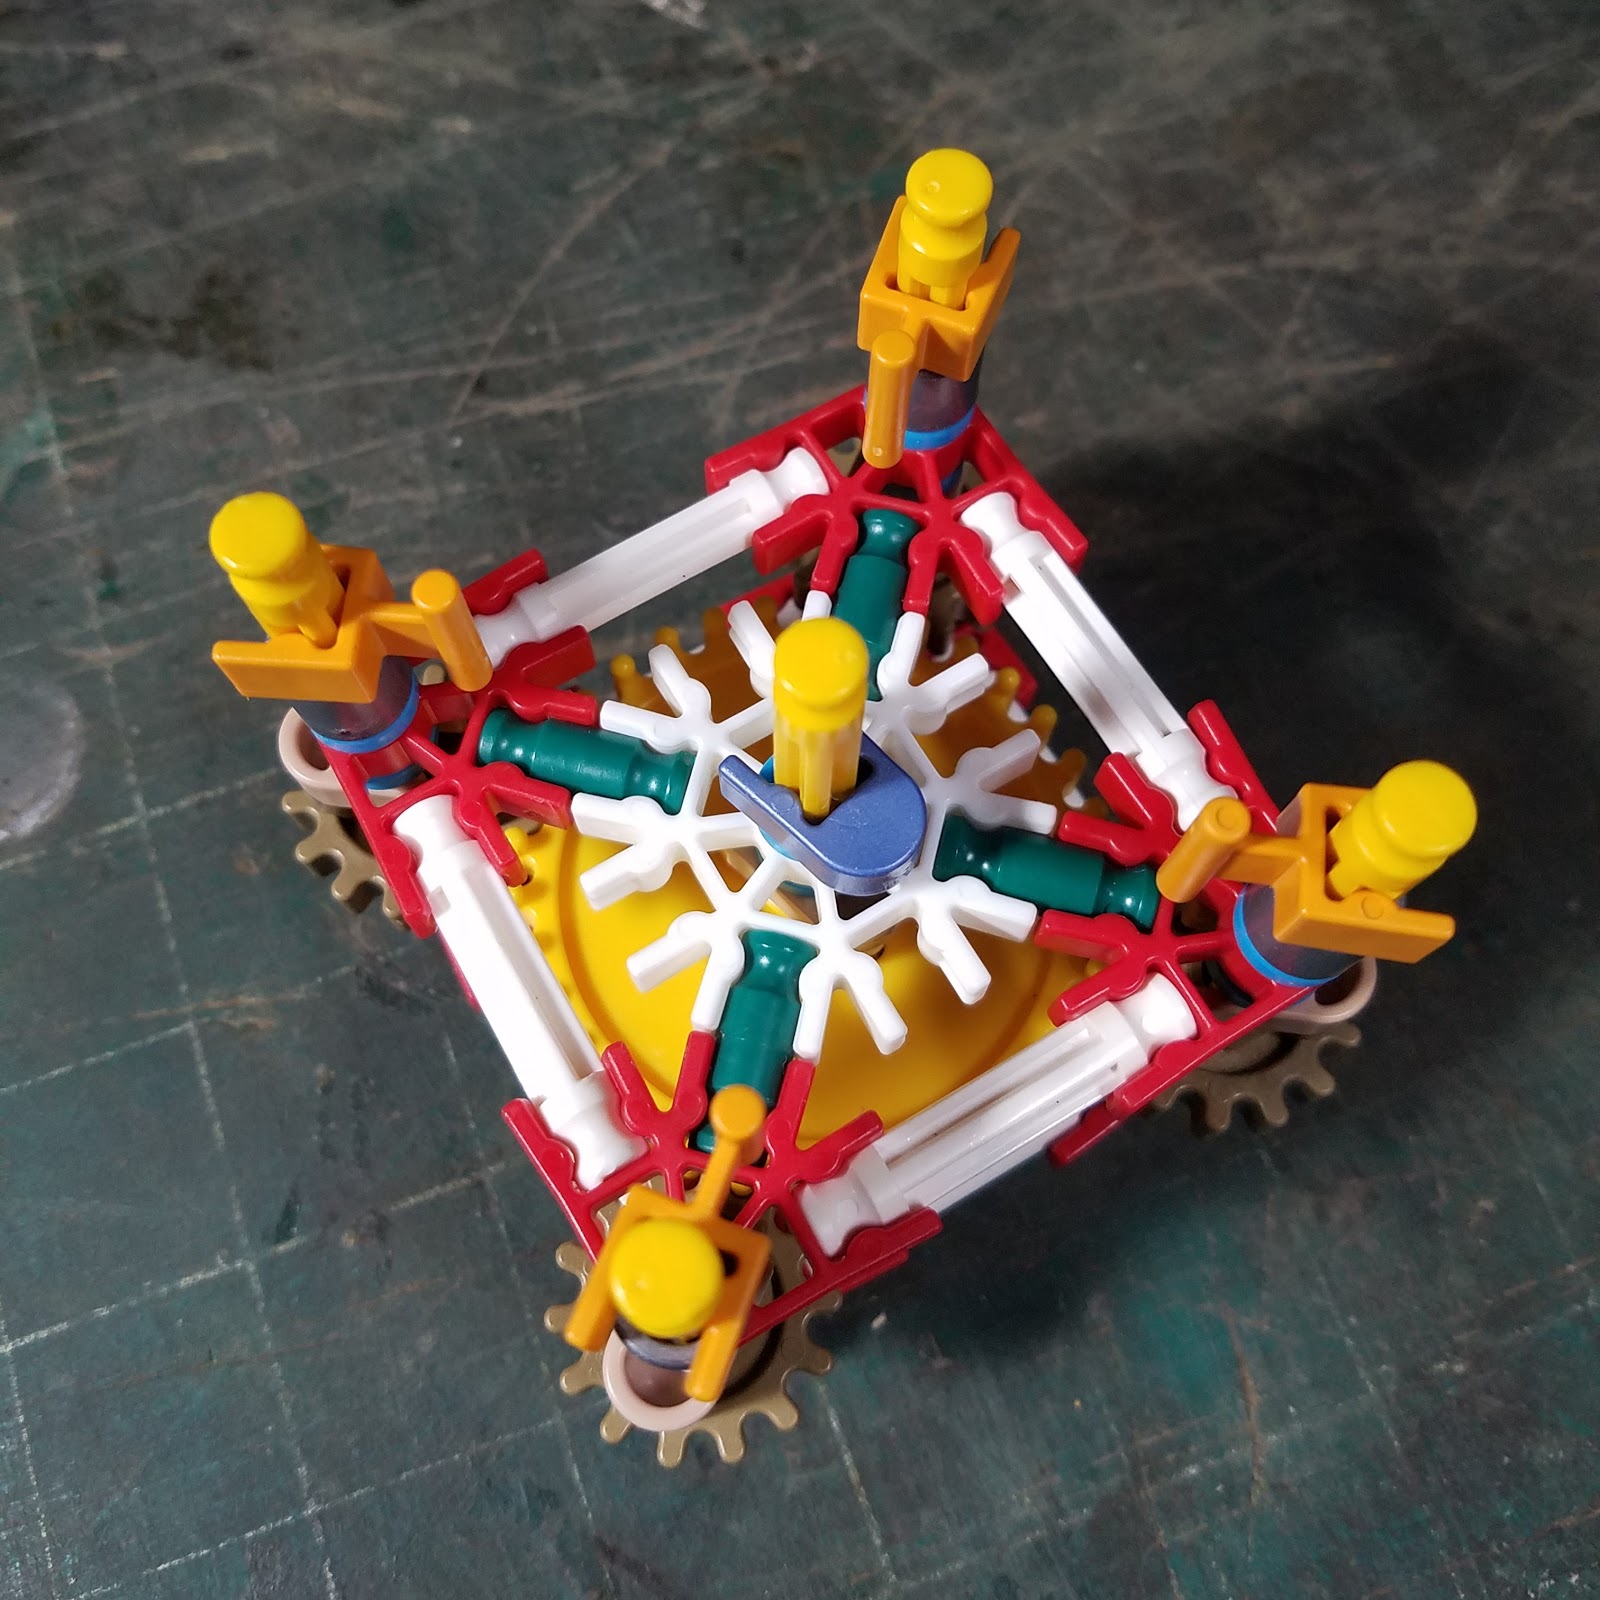
K’Neffy’ string twister setup:
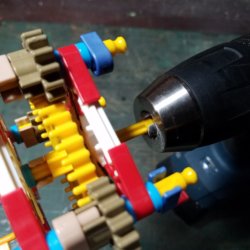 You will need at least 9 linear foot of free space with a sturdy table at the dead end to clamp the hook-board too, and a somewhat moveable table at the live end for the drill.
- A cordless drill that stands up is really handy here. Put just the smooth end of the yellow shaft into the Jacob’s chuck, the end of the jaws stop where the + section of the shaft starts. If you put the shaft deeper into the chuck the shaft usually spins crooked, which makes for a wobbly string-twisting experience and uneven results. Tighten down on the shaft pretty good. If it slips out you can usually save it, but it’s a real hassle.
- Use a few books or boards to lay the drill on, or better yet; a makeshift stand to hold the drill upright. Need to keep the drill from sliding forward as you lace the rig.
- “C” clamps are great to hold down the dead end (the hook-board) to a sturdy table or countertop.
- Keep a pair of scissors at each end, one by the drill and one by the hook board. This will save you approximately 4 million steps.
- Use a measuring tape to measure from a dead hook to a live hook, start about 40% longer than the desired final length. Example: 70” x 1.4 = 98”. The thickness of final product (or number of strands on the hooks) will change this ratio; thinner string will need more wind up and thicker string will need less. See “When to stop” paragraph below.
- Use a tub on the floor halfway between the two ends to hold the thread ball. This tub may also serve to hold all this stuff when you are not using it.
- Get several rolls of 100% cotton size 10 crochet thread. The thickness and stiffness varies quite a bit from brand to brand and also from un-dyed to dyed.

Operation:
- Lacing the rig for 4×2 – for your first string, we want two threads between each set of hooks. Start at the dead end with a loop at the end of the string and then go back and forth until you get back to the dead end on the fourth hook, tie another loop and put it on the hook. For 4×2 thread I usually end up with a final thickness of 0.08 inches (2 mm).
- Lacing the rig for 4×3 – this really needs a video or diagram but until I get that done I will do my best to explain… start at the live end and lace one hook three times. Lace the hooks that are up and accross (not diagonal) with two strands each and then lace the hook diagonal to the first with three, tying off at the live end. Start at the live end again and add a strand to one of the doubles, turn around at the dead end ant tie off back at the live end. For 4×3 thread I usually end up with a final thickness of 0.10 inches (2.5 mm).
- Wind up – for right handers, put your drill in “reverse” and thus the four hooks will spin “forward”. When you do the wind up, the four lines will flutter at various wavelengths. Don’t worry if the waves are not exactly the same, that is normal. Experiment with the drill speed and how hard you pull back to find a smooth wavelength. DON’T PULL TOO HARD ON THE WIND UP.
- The handle – the little piece sticking off to the side is intended as a handle to hold while doing the wind-up. I don’t use it because I always forget to orient the handle in the right position before I lace the rig up, so I just put my thumb and index finger on the outermost frame to hold it steady.
- Even tension – Keeping even tension on the lines takes a little practice and patience. While not spinning, if one line sags more than the others, take up the slack at the yellow-orange knex hook. First wrap over the front post and then around the flat part a few times until the tension is more even.
- When to stop – Stop when you feel the rig firmly twisting against you or when you see the threads start to kink up. When either of these happen, reverse the drill until you get a tight but stable condition, and then rewind.
- Rewind – to rewind, simply let go of the rig, keep firm pull-back tension and start the drill in the same direction it was going for the wind-up. The whole rig will spin. Do this until the triangle of threads at the front of the rig gets to be about equilateral. Cut the thread at the drill end first, it should de-tension a little bit when you do. Before you take it off the dead end, give the free end a firm pull to stretch it out.
Maintenance:
- Lube – I have lubed the string machine and it should not need lube again for a long time, not until it rattles quite a bit. I use Brain Lube.
Want to print this?
C. Neff
World Champion 2016
C.Neff, 2016 world champion, spins since many years sharing lot of tricks, tips and tutorials…